References:
- Kozier & Erb’s Fundamentals of Nursing: Concepts, Process, and Practice, 11th Edition, ISBN 9780135428733, by Audrey Berman, Shirlee J. Snyder, and Geralyn Frandsen (Ch. 29, pp. 571-579)
Assessing a client’s health status is a major component of nursing care and has two aspects: history taking and physical examination. A physical examination may be (a) a comprehensive initial assessment), (b) a focused examination of a body system or area when indicated, and (c) a functional assessment that examines one or more of the client’s abilities (e.g., nutrition and metabolism, elimination). This may be done to:
- Obtain baseline health data about the client’s functional abilities.
- Supplement, confirm, or refute data obtained in nursing history.
- Obtain data that will help establish nursing diagnoses and plan of care.
- Evaluate the physiologic outcomes of healthcare and thus the progress of a client’s health problem.
- Make clinical judgments about a client’s health status.
- Identify areas for health promotion and disease prevention.
A health assessment utilizes frameworks to guide the procedure. This is variable and depends on the patient, the nurse, and the agency, but is commonly taught using the head-to-toe framework for the thorough initial assessment.
- General Survey
- Vital Signs
- Head
- Neck
- Upper Extremities
- Chest and Back
- Abdomen
- External Genitals
- Anus
- Lower Extremities
For hospitalized clients, a quick assessment is done at the beginning of a shift (“shift assessment”) as baseline for comparing with later data. It uses a different framework:
- Observe:
- Level of consciousness
- Skin color
- Respiratory effort
- Nutritional status
- Body position (e.g., does the client appear in pain?)
- Speech
- Hygiene and grooming
- Check vital signs including pain and pedal pulses.
- Auscultate lungs and apical pulse.
- Check capillary refill and peripheral edema.
- Auscultate bowel sounds.
- Observe skin turgor and surfaces for lesions (anterior and posterior, especially bony prominences).
- Observe mobility (all four extremities, weight bearing).
- Examine drains, catheters, wound dressings or tubes: location, patency, and description of drainage, if any.
Most commonly, the assessment is based on client status; a client complaining of abdominal pain will warrant an abdominal assessment (IAPP), a client admitted with head injury warrants assessment of the level of consciousness via the Glasgow Coma Scale, etc.
Preparing the Client and Environment
- The time of the assessment should be convenient to both the client and the nurse. The environment should be well lighted and equipment should be organized for efficient use. Temperature should not be a cause of discomfort for the patient.
- Privacy is important. Most people are embarrassed if their bodies are exposed or if others can overhear or view them during the assessment. Draping should be done carefully to ensure only the necessary parts of the body are exposed.
- Reassure the client by explaining each step of the procedure and its purposes. Inform them that all data gathered and documented during the assessment is kept confidential.
- Determine any contraindicated positions for the patient. Assist them into a gown and instruct them to empty their bladder. This facilitates relaxation as well as palpation of the abdomen and pubic area.
- Several positions may be required for the physical assessment. The patient’s physical condition, energy level, and age should be considered. Some positions may be embarrassing and uncomfortable and therefore should not be maintained for long.
Positioning
- Sitting: a seated position, back unsupported and legs hanging freely.
- Assess: head, neck, posterior and anterior thorax, lungs, breasts, axillae, heart, vital signs, upper and lower extremities, reflexes
- Supine (horizontal recumbent): back-lying position with legs extended; with or without pillow under the head.
- Assess: head, neck, axillae, anterior thorax, lungs, breasts, heart, vital signs, abdomen, extremities, peripheral pulses
- Semi-Fowler’s: back-lying with the head of the bed elevated approximately 30°–45°.
- Assess: jugular vein
- Sims’: side-lying position with lowermost arm behind the body, uppermost leg flexed at hip and knee, upper arm flexed at shoulder and elbow.
- Assess: rectum, vagina
- Dorsal Recumbent: back-lying position with knees flexed and hips externally rotated; small pillow under the head; soles of feet on the surface.
- Assess: female genitals, rectum, female reproductive tract
Methods of Examining
Four primary techniques are used in the physical examination: inspection, palpation, percussion, and auscultation. These techniques apply to each body system.
Inspection
Visual examination. A lighted instrument may be used (e.g., otoscope, ophthalmoscope). Senses of smell and hearing are also used.
- Moisture, color, and texture of body surfaces, as well as shape, position, size, color, and symmetry of the body.
- The use of sight requires adequate lighting. The use of auditory senses requires a quiet environment.
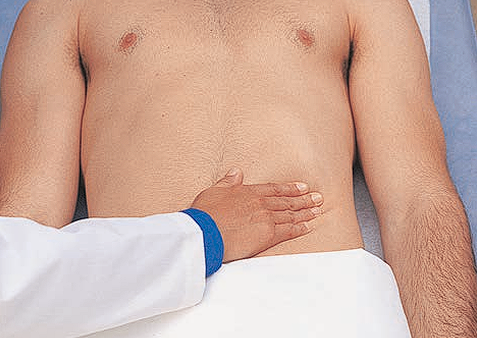
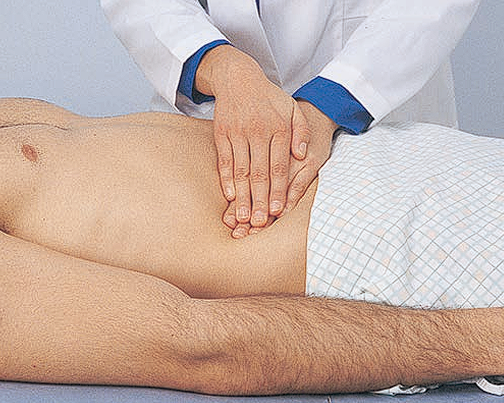
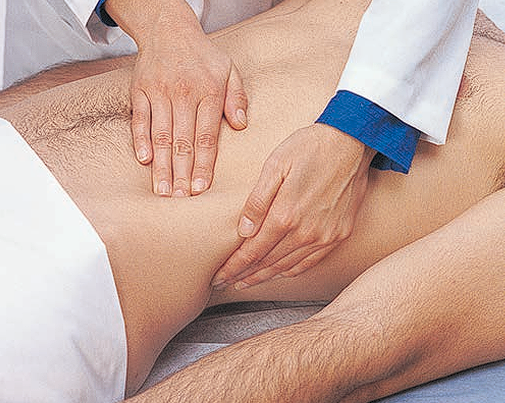
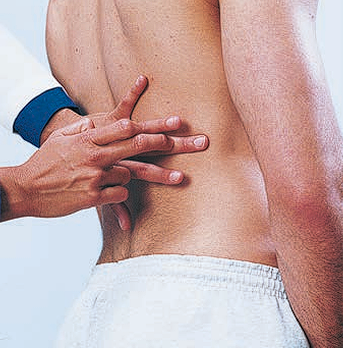
Palpation
Tactile examination. The pads of the fingers are used because of their concentration of nerve endings. This may be light— fingers are parallel to the skin and pressed gently while moving the hand in a circle, or deep— a bimanual exploration that utilizes the dominant hand to feel and the nondominant hand to apply adequate pressure. Deep palpation is not usually done routinely and requires significant practitioner skill; a lack of skill in deep palpation can cause injury or pain. In both types of palpation, the examiner’s skin should be clean and warm, and fingernails short.
- Texture, distention, pulsation
- Vibration, with the use of the palmar surface of the hand.
- Temperature, with the use of the dorsal surface of the hand (thinner skin allows for greater sensitivity).
- Position, size, consistency, mobility of organs or masses
- Tenderness or pain. Areas of tenderness should be palpated last.
Relaxation is imperative for effective palpation. Stay aware of the client's verbal and facial expressions that indicate discomfort.
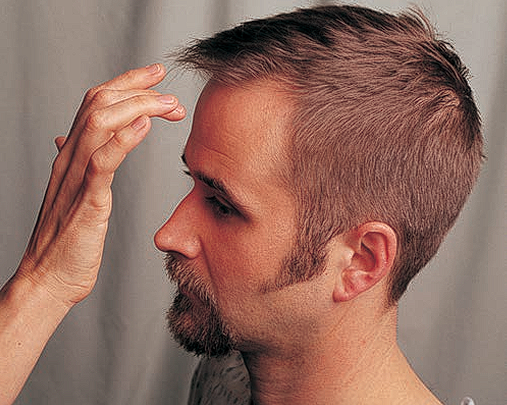
Percussion
Elicit sound or vibrations by striking the body surface. This can be done in two ways—
- Direct, where the body surface is struck with the pads of two, three, or four fingers or with the pad of the middle finger.
- Indirect, where a pleximeter and a plexor are used. The pleximeter is the middle finger of the nondominant hand placed firmly on the client’s skin (only the distal phalanx and joint of this finger should be in contact with the skin), and the plexor is the tip of the flexed middle finger of the other hand that strikes (at a 90° angle) the pleximeter at the distal interphalangeal joint or between the distal and proximal joints.
The motion for percussion originates from the wrist; the forearm remains stationary. The blows must be firm, rapid, and short to obtain a clear sound. Percussion is used to determine the size and shape of internal organs by establishing their borders. It indicates whether tissue is fluid filled, air filled, or solid.
| Sound | Intensity | Pitch | Duration | Quality | Example |
|---|---|---|---|---|---|
| Flatness | Soft | High | Short | Extremely Dull | Muscle, Bone |
| Dullness | Medium | Medium | Moderate | Thudlike | Liver, Spleen, Heart |
| Resonance | Loud | Low | Long | Hollow | Normal Lung |
| Hyperresonance | Very Loud | Very Low | Very Long | Booming | Emphysematous Lung |
| Tympany | Loud | High (musical) | Moderate | Musical | Stomach filled with gas (air) |
Auscultation
Auditory examination of sounds produced within the body. This may be direct or indirect.
- Direct auscultation uses the unaided ear, such as for respiratory wheeze or the grating of a moving joint.
- Indirect auscultation uses a stethoscope, which transmits sounds to the nurse’s ears of internal sounds such as bowel sounds or valve sounds of the heart and blood pressure.
Stethoscopes
The stethoscope tubing should be 12 to 14 inches long, with an internal diameter of about 0.3 cm (1/8 in.). It should have a flat-disk diaphragm for high-pitched sounds and a bell-shaped amplifier for low-pitched sounds. The earpieces of the stethoscope should fit comfortably into the nurse’s ears, facing forward.
- The amplifier should be placed firmly but lightly against the client’s skin. If excessive hair is present, dampen the hairs with a wet cloth so that they will die flat against the skin and not interfere with clear sound transmission.
Auscultated sounds may be defined by their pitch (frequency of vibration), intensity (amplitude; loudness), duration, and quality (subjective description, e.g., whistling, gurgling, snapping).
General Survey
Health assessment begins with a general survey that involves observation of the client’s general appearance, level of comfort, and mental status, and measurement of vital signs, height, and weight. Many components of the general survey are assessed while taking the client’s health history, such as the client’s body build, posture, hygiene, and mental status.
- Appearance and Mental Status
- Vital Signs are measured to establish baseline data and to detect actual and potential health problems.
- Height and Weight is obtained in both self-image and actual weight. Excessive discrepancy may point to actual or potential problems in self-concept. Recent changes in weight, if unintentional, should be noted.
- Height: measured against a wall/measuring stick with the body stood erect, footwear removed, and eyes looking straight ahead.
- Weight: best measured in the morning, after emptying the bladder and before breakfast. Scales used should be the same each time, used at the same time of day, similar clothing, and no footwear. Chair or bed scales exist for patients who cannot stand.